About Me

My photo
Houston, TX
Just your atypical hispanic male living in the big city

Saturday, September 29, 2012

It's Breakfast Time - Spam and Eggs

I love me some Spam. When I was growing up, we really couldn't afford a lot of things even when we were getting our usual government assistance. One of those things that we could afford was Spam, Treet or Potted Meat. I learned (as with most things) early on that there are many creative ways to cook these different canned meats.

This recipe I learned as one of the first things to cook when I was a kid. This really went a long way when feeding myself, my mom and sisters. MC is a real snob when it came to Spam. When I cooked this for breakfast, the negative mindset was TOTALLY changed. We have this every so often, but I still have my preference for breakfast. Nothing like having Spam and egg tacos!

Ingredients:

1 can 12 oz Spam
2 tbsp butter
1 med sized onion
6 large eggs
1/3 cup half and half
1 tsp garlic powder
pepper to taste

Start by having a large cooking pan and place the butter into the pan. Have the heat on medium high. Allow to melt, but avoid the butter to brown.


Dice the onions and the Spam. Add both onions and Spam to the heated pan. Allow to cook through (onions should be translucent).


While the Spam/onions are cooking, add the pepper, salt and garlic powder I normally don't like to add too much salt to the Spam as it is salty enough. Add the salt sparingly. Continue to cook and reduce the heat some.


Crack all the eggs in a bowl. Once eggs are cracked open, add the half & half. Whisk the egg mixture until frothy. Add the egg mixture to the cooking Spam. Allow to cook, but don't over cook (until at least cooked through).
 

You have your choice when you finally cook the Spam and Eggs. I have made MC's into scrambled eggs with the some homemade salsa and cheese (along with the toast). I in turn have made my tacos with cheese. Remember, don't hate Spam, its a great food item that you can use in different ways. Enjoy!

Wednesday, September 26, 2012

Pork-Macaroni Cheesy Casserole

So I had some leftover pork loin and wasn't sure what I wanted to make for dinner. I thought, "Well, I haven't had any cheesy casserole in a long time...why not?" I then thought of different ways to prepare this dish. I opted to just make it plain and simple, but hearty enough to fill my belly (why lie).

Ingredients:

4 - 5 pieces of leftover pork (using pork loin)
1 cup onions
9 oz macaroni shells
water (enough for boiling macaroni) about 3 - 4 cups
1 tsp salt
1 cup milk
3 tbsp butter
1 tsp fresh ground pepper
1 tsp paprika
1/2 cup white cheddar
1/2 cup Colby jack
1/2 cup Monterrey jack
1/2 cup Velveeta
1 cup frozen peas
additional paprika, salt and pepper

Preheat your oven at 350 degrees. Then, start with boiling the water in a nice sized pot. I normally add the 1 tsp of salt to the water while it is starting to boil. When it is coming to a rolling boil, add the pasta to the water. I used up half of a box of shells (they only come in 8 or 16 oz). I poured in a little over 1/2 of the box.


Take out the pork loin that I had cooked the previous night before. Luckily, I had enough that I have been giving MC sandwiches and be able to do this dish. Notice that I am also using leftover onions that were cooked with the pork.

  
Dice the pork and onions. Place off to the side.


Check the macaroni. If it is tender, take off the heat and drain. Since you are using shells, make sure you shake it a little to get rid of any of the excess water that my be lingering. Place back into the pot.


Add the butter, milk and cheese to the macaroni. Start to stir and mix in the cheese.


Mix in the spices after you  have added the cheeses. Don't worry if your cheese is not fully melted, it will melt in the oven.
 

Place the diced pork and onions into an ungreased baking dish. I am using a glass baking dish, so the cooking time might have to be a little longer. Add the macaroni as well. Mix until incorporated well.


Add the peas to the mixture. After you have added the peas, sprinkle paprika to the top of the casserole. I do sometimes add panko to my casseroles, but for this one, I forgo it.


Allow this to cook for about 20 - 30 minutes or until you have a nice crust on the casserole. Serve this with a nice salad and some fresh bread. This is such an easy dish and you can always change it up by adding more veggies or other types of meat.

Saturday, September 22, 2012

Fried Chicken

There's nothing like frying some chicken. Yes, its one of those items that can be rather unhealthy, but I am a true believer in moderation. Remember, I used to be a big person and my usual meal was having something fried. Was it good? Sure. But I had learned the hard way that you can still enjoy fried food, but it has to be not so very often. Nowadays, I think I might have fried chicken once in a while (even something as a burger from a local chain). When I do have a hunkering for fried chicken, I make enough to last for a couple of days. MC likes to have fried chicken cold the next day, so the rest of this chicken is for MC's lunch. Very much enjoyed, believe you me.


The following recipe is something that I have done since I learned how to fry chicken from my grandmother. She had shown me many different ways to fry chicken, but I find that I like this recipe since it creates a nice crust.

Ingredients:

12 pieces of chicken (preferably leg quarters, cut in halves)
1/2 gallon of vegetable oil (or enough to cover the chicken when frying)

flour mixture
2 - 3 cups flour
1 tsp paprika
1 tsp garlic powder
1 tsp fresh ground pepper
1 tsp onion powder
1 tsp sea salt
1 tsp Mrs. Dash seasoning (regular seasoning should suffice)
1 tsp lemon pepper
1 tsp cayenne pepper

liquid mixture
3 eggs
1 cup milk
1 tsp paprika
1 tsp garlic powder
1 tsp fresh ground pepper
1 tsp onion powder
1 tsp sea salt
1 tsp Mrs. Dash seasoning
1 tsp lemon pepper
1 tsp cayenne pepper

Start to cut the chicken in half and rinsing with water. Again, like most food items, I prefer to rinse my food to take off any preservatives, etc. After you have rinsed all of the chicken, salt and pepper the chicken and place off to the side.


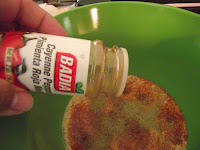
After you have rinsed, cut, and salted/peppered the chicken, start to placing the eggs to a large bowl. Add the milk and then all of the spices.


Sift the flour and add the spices to the mix. Notice that I using the same spices that you have used in the liquid mixture.

Now that you have added all of the spices to both your wet and dry mixtures, mix each. I use a fork with the flour mixture and whisk well with the liquid mixture.


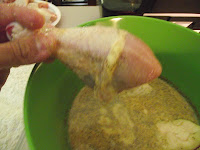
Place at least two pieces of chicken into the liquid mixture.Allow the mixture to soak for a minute or two.


Once you have taken the chicken from the liquid mixture, add the pieces of chicken into the flour mixture. Make sure you coat the chicken well.


After the chicken is well covered, add again back to the liquid mixture making sure that the chicken is covered with egg mixture and place back in the flour mixture.


Make sure you heat the oil. Sometimes, I have used a large cast iron skillet. Luckily, we purchased an electric skillet. This is perfect when cooking large amounts of chicken. Add the oil to the skillet. You wan to make sure its filled halfway. It assures that the chicken will be covered in oil. Heat the oil on high. After about 5 minutes, you can test to see if the oil is well heated by adding a small pieces of dough. If it starts to cooking or popping, then its ready.


Once you notice that the flour is cooking well, you may start to add the chicken to the skillet. Add each piece assuring that there is some space between each piece. After you have placed the chicken to the skillet, cover and allow to cook. Cook for about 5 minutes covered. Check the chicken and flip. Cover the chicken and continue to cook for another 5 minutes. Take a thermometer and check to see that the internal temperature reads between 160-180 degrees.


Cover a cookie sheet with some paper towels.  This allows the chicken to drain any excess oil onto the covered cookie sheet. Notice that the crust is a golden brown. This is what you want for a crust. You can preheat your oven to 200 degrees and this keeps the chicken warm while you are cooking the rest of the chicken.


Needless to say, this was great on a for any evening. I made the chicken with mashed potatoes, green beans and White Cream Gravy. Ya gotta keep people happy with some really great food! : )